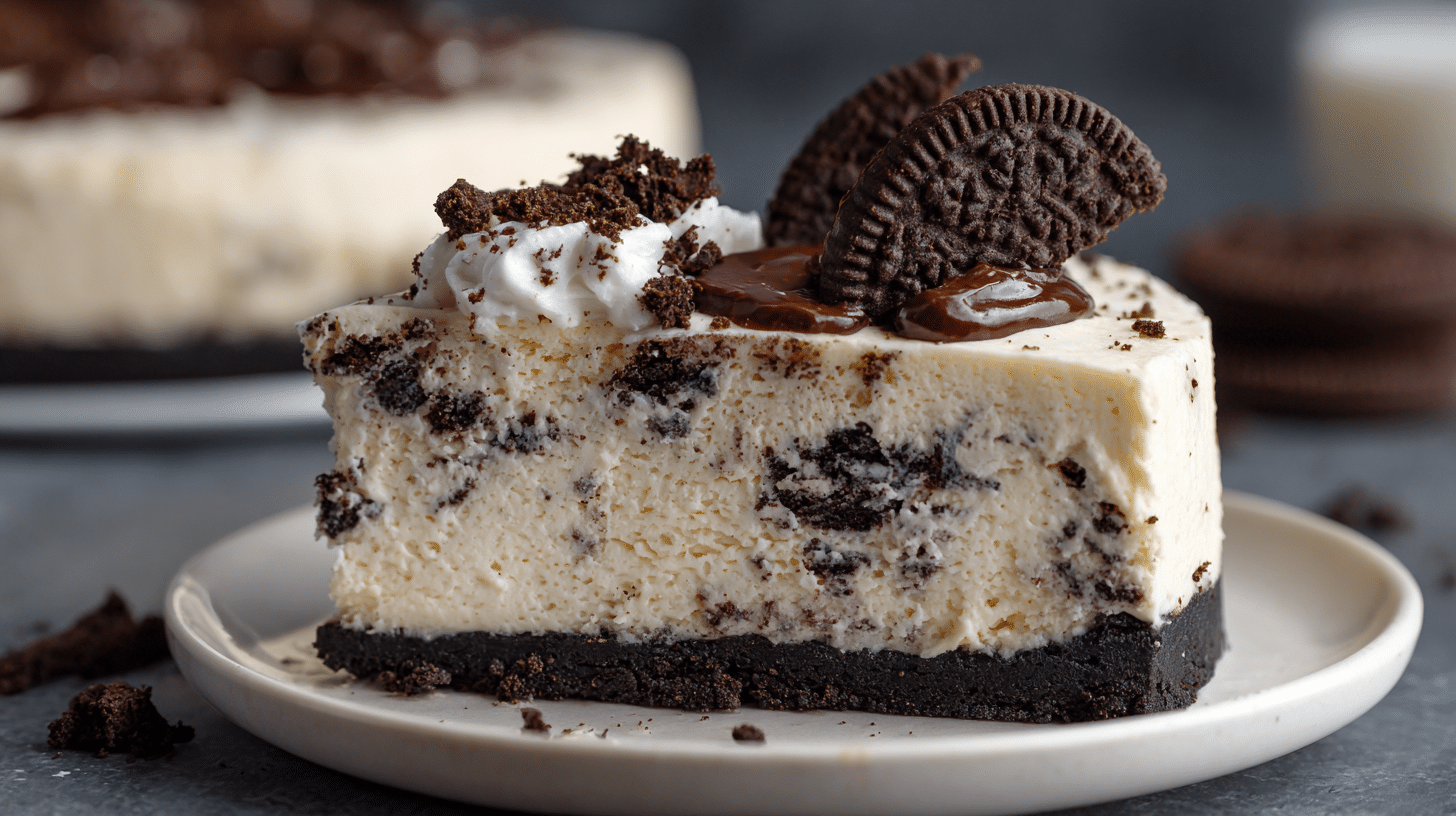
This no bake Oreo cheesecake recipe is ultra-creamy, crunchy, and fuss-free. Perfect for beginners, no oven needed, and ideal for make-ahead desserts.
Why You’ll Love This Recipe

This no bake Oreo cheesecake recipe gives you all the creamy, tangy cheesecake goodness without ever switching on your oven. It’s the kind of dessert you can pull together on a hot day or before a busy event without stressing about water baths or cracks.
Table of Contents
You get a perfect contrast: a buttery, crunchy Oreo crust on the bottom and a light, mousse-like Oreo cream cheese filling on top. The texture feels special enough for birthdays, holidays, or potlucks, but the method is simple enough for a weeknight treat.
No oven needed
Because this is a no bake cheesecake, your fridge does all the work for you. You don’t have to worry about baking times, hot spots in your oven, or cracked tops.

This makes the recipe ideal if:
- You have a small or unreliable oven
- You’re cooking several things at once for a party
- It’s too warm to comfortably use the oven
Creamy filling + crunchy crust
The cream cheese and whipped cream give you a light but rich filling, while whole chunks of Oreo add pockets of crunch and chocolate flavor. The crust uses the Oreo cream too, which builds in more flavor with fewer ingredients.
If you love textural contrast in desserts, this hits all the notes: crunchy crust, creamy filling, and crispy cookie pieces.
Perfect for beginners
The steps are straightforward: crush, mix, whip, fold, chill. You’ll practice:
- Softening cream cheese properly
- Whipping cream to stiff peaks
- Folding gently for a mousse-like texture
Even if this is your first cheesecake, you can get professional-looking results with a springform pan and a bit of patience while it chills.
Make-ahead friendly
No bake cheesecakes actually improve in texture after chilling overnight. The filling firms up, the flavors meld, and the crust holds together better when sliced.
You can:
- Make the cheesecake 1–2 days in advance
- Decorate the top up to a few hours before serving
- Freeze leftovers for future treats

No Bake Oreo Cheesecake Recipe
- Total Time: 6 hours 25 minutes
- Yield: 1 (9-inch) cheesecake 1x
Description
This no bake Oreo cheesecake is ultra-creamy, loaded with crunchy Oreo pieces, and comes together without ever turning on your oven. It’s perfect for busy weeknights, summer gatherings, or holidays when your oven is already full. Chill it ahead of time, slice, and watch it disappear at any American potluck or family party.
Ingredients
24 Oreo cookies, finely crushed (for crust)
6 tablespoons unsalted butter, melted
Pinch of fine salt (optional)
24 ounces full-fat brick cream cheese, softened
1 cup powdered sugar
1 teaspoon vanilla extract
1 ¾ cups cold heavy whipping cream
12 Oreo cookies, chopped (for filling)
1 cup cold heavy whipping cream (for topping)
3 tablespoons powdered sugar (for topping)
1 teaspoon vanilla extract (for topping)
8 Oreo cookies, halved or crushed (for garnish)
Instructions
Line the bottom of a 9-inch springform pan with parchment paper and set aside.
Add 24 Oreos to a food processor and pulse into fine crumbs, or crush them in a zip-top bag with a rolling pin.
Stir the crumbs with melted butter and a pinch of salt until evenly moistened, then press firmly into the bottom of the pan to form a crust. Refrigerate while you make the filling.
In a large mixing bowl, beat the softened cream cheese on medium speed until completely smooth and free of lumps.
Add powdered sugar and vanilla extract, then beat again until fully combined and creamy, scraping down the bowl as needed.
In a separate chilled bowl, whip 1 ¾ cups cold heavy cream on medium-high speed until stiff peaks form.
Gently fold the whipped cream into the cream cheese mixture in 2–3 additions, using a spatula to keep the mixture light and airy.
Fold in the 12 chopped Oreos just until they are evenly distributed throughout the cheesecake filling.
Pour the filling over the chilled crust and smooth the top with an offset spatula or the back of a spoon.
Tap the pan gently on the counter a few times to release any large air bubbles.
Cover the pan tightly with plastic wrap or foil and refrigerate for at least 6 hours, preferably overnight, until fully set.
When ready to serve, whip 1 cup heavy cream with 3 tablespoons powdered sugar and 1 teaspoon vanilla until stiff peaks form.
Pipe or spread the whipped cream over the top of the cheesecake and decorate with halved or crushed Oreos.
Run a thin knife around the inside edge of the pan, release the springform ring, and slice with a hot, clean knife. Serve chilled.
Notes
Use full-fat brick cream cheese for the best texture; low-fat or tub cream cheese can make the cheesecake too soft.
Make sure your cream cheese is softened and your heavy cream is very cold for a smooth filling and strong whip.
Chill the cheesecake at least 6 hours (overnight is best) so it sets firmly and slices cleanly.
For easy slicing, dip your knife in hot water, wipe it dry, and clean the blade between each cut.
- Prep Time: 25 minutes
- Category: Dessert, American cuisine
- Cuisine: American
Nutrition
- Calories: 500
Ingredients
Short ingredient lists can hide a lot of technique, so this section walks you through not just what you need, but why you need it and what you can swap.

For the Crust
You only need:
- Oreo cookies: These give you both the chocolate biscuit and the creamy filling, which helps bind and flavor the crust.
- Unsalted butter: Binds the crumbs and sets firm in the fridge, giving you a sliceable base.
- Salt (optional): A tiny pinch balances the sweetness and makes the chocolate flavor pop.
Texture tip:
Crush the Oreos very finely for a firm, compact crust. If the crumbs are too coarse, the base may crumble when you cut it.
For the Filling
- Full-fat brick cream cheese: This is the backbone of the cheesecake. Full-fat is essential for structure and that classic tangy richness. Tub cream cheese tends to be softer and can lead to a looser filling.
- Powdered sugar: Dissolves easily into cream cheese without grittiness, helping keep the filling smooth.
- Vanilla extract: Rounds out the chocolate and cream flavors.
- Heavy whipping cream (or double cream): When whipped to stiff peaks, it gives the cheesecake a light, airy texture without needing gelatin.
- Oreo cookies (chopped): Add flavor, texture, and that signature Oreo look in every slice.
For Topping
- Whipped cream: A soft, cloud-like contrast to the dense filling.
- Extra Oreos: Simple but effective decoration; you can ring the outside, crumble over the top, or stand them upright in whipped cream swirls.
Substitutions & Variations (Cream cheese, whipped cream, Oreo types)
You don’t have to be locked into one version. Here’s how you can safely tweak it without ruining the texture.
Cream cheese swaps
- Neufchâtel (⅓ less fat): Works, but the filling will be slightly softer and less rich. Chill time becomes more important; consider chilling overnight.
- Mascarpone: Gives a milder, almost dessert-like flavor and ultra-creamy texture. Great mixed half and half with cream cheese.
- Low-fat cream cheese: Not recommended if you want clean slices; it often doesn’t set as firmly.
Whipped cream options
- Stabilized whipped cream: You can gently fold in a bit of softened cream cheese or use a small amount of mascarpone to stabilize if you need the cake to sit out longer.
- Non-dairy whipped topping: Works if fully thawed and folded gently into the cream cheese mixture; flavor will be slightly different and sweeter.
Oreo types
- Golden Oreos: Lighter, vanilla-forward cheesecake with the same texture.
- Double Stuf Oreos: Use them inside the filling and topping, but stick with regular Oreos for the crust to avoid excess softness.
- Flavored Oreos (mint, peanut butter, birthday cake): Great for themed variations—replace all or part of the regular Oreos with your chosen flavor.
Equipment (Minimal List)
You really don’t need fancy gear, but a few tools make your life a lot easier.
- 9‑inch (23 cm) springform pan
- Food processor or strong zip-top bag + rolling pin (for crushing cookies)
- 2 mixing bowls (one large, one medium)
- Electric hand mixer or stand mixer
- Rubber spatula
- Measuring cups and spoons
- Offset spatula (optional but helpful for smoothing the top)
- Sharp knife and hot water (for clean slicing)
How to Make No Bake Oreo Cheesecake
Step 1 – Make the crust
- Crush Oreos into fine crumbs.
- Mix with melted butter (and a pinch of salt, if using) until fully moistened.
- Press firmly into lined springform pan, packing it down well.

Pro tip:
Focus extra pressure around the edges where the crust comes up the sides so it doesn’t crumble when you remove the ring.
Step 2 – Prepare the filling
- Beat softened cream cheese until smooth. Scrape the bowl several times.
- Add powdered sugar and vanilla; beat again until fully combined.
- In a separate chilled bowl, whip very cold heavy cream to stiff peaks.
- Gently fold the whipped cream into the cream cheese mixture.
Temperature check:
If your cream cheese is still cold and hard, you’ll never get a smooth filling. Let it sit at room temperature 20–30 minutes before starting.
Step 3 – Fold in Oreos
- Chop Oreos into pieces—some small, some chunky.
- Fold into the cheesecake filling with a spatula, stopping as soon as they’re evenly distributed.
Color tip:
If you want a mostly white filling with high contrast, keep the chunks larger and don’t overmix. Over-crushing the Oreos can turn the whole filling gray.
Step 4 – Chill
- Pour filling over the chilled crust.
- Smooth the top and tap lightly on the counter to remove large air bubbles.
- Cover tightly and refrigerate at least 6 hours, preferably overnight.
Safety note:
Keep the cheesecake below 40°F (4°C) during chilling. Do not leave it at room temperature for more than 1–2 hours total when serving.
Step 5 – Decorate & serve

- Whip topping cream, powdered sugar, and vanilla to stiff peaks.
- Pipe swirls or spread over the cheesecake.
- Decorate with Oreos in your favorite pattern.
- Run a thin knife around the pan edge, then remove the springform ring.
- Slice with a hot knife (dipped in hot water, then dried) for sharp, clean slices.
Pro Tips for the Best Cheesecake
Room-temp cream cheese
- Take the cream cheese out 20–30 minutes before you start.
- If you’re in a hurry, cut it into cubes and let it sit—small pieces warm faster.
- Always beat the cream cheese fully smooth before adding sugar or cream; this prevents small lumps.
Whip the cream properly
- Use cream that’s very cold; warm cream will never whip to stiff peaks.
- Start on medium speed, then go to high once it starts thickening.
- Stop as soon as you reach stiff peaks; overwhipped cream looks grainy and can separate.
How to avoid runny / loose filling
- Use full-fat brick cream cheese.
- Whip cream to stiff peaks, not soft.
- Don’t rush the chilling time; under 4–5 hours is usually too soon to slice.
- Keep your ratios: if you add significantly more cookies or liquid flavorings, the structure can weaken.
Crust troubleshooting
- Crust too crumbly: Add 1–2 extra tablespoons melted butter, press more firmly, or chill longer.
- Crust sticks to pan: Use parchment paper and let the cheesecake warm just a few minutes before slicing.
- Crust too hard to cut: You may have compacted it too firmly or used too much butter; next time, press more gently.
Clean slicing techniques
- Use a long, sharp knife.
- Dip into very hot water, wipe dry, slice straight down, then pull out cleanly.
- Wipe the blade between each cut so every slice looks bakery-perfect.
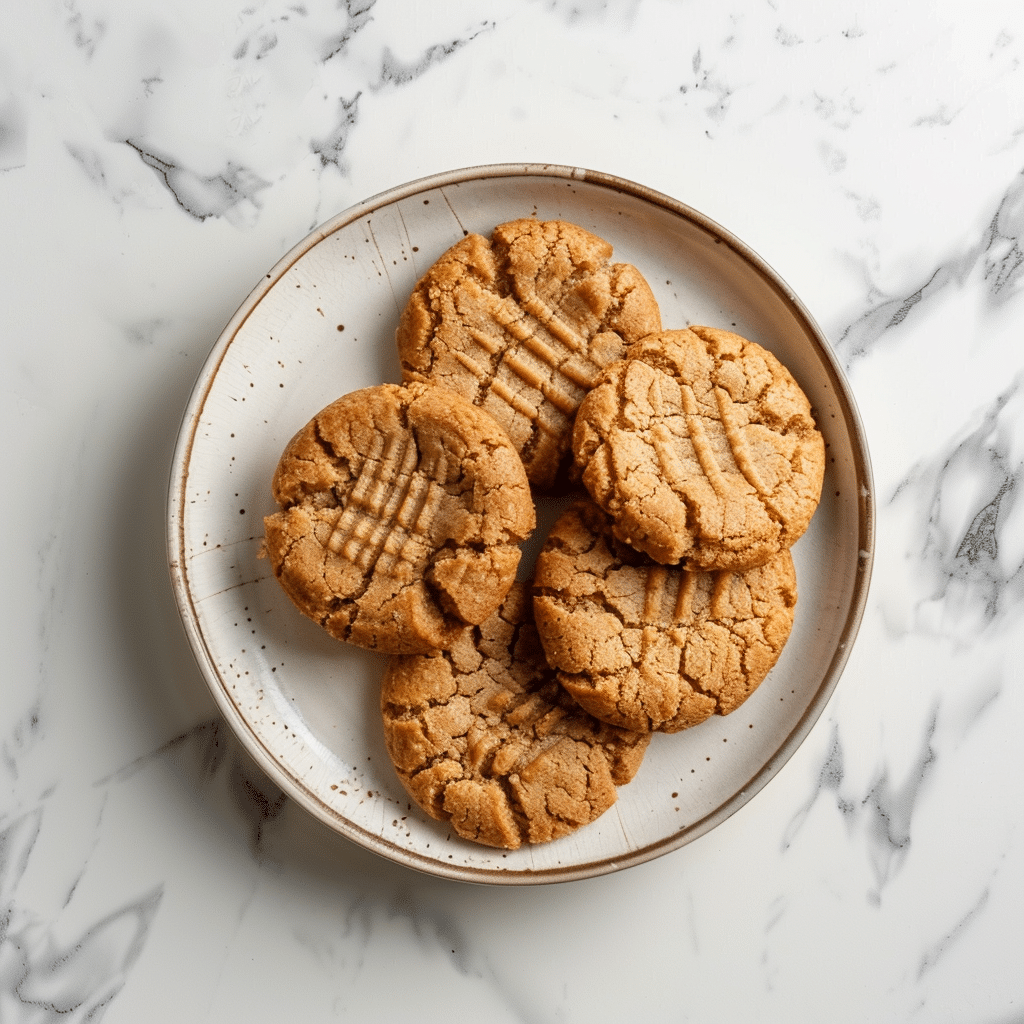
If you’re looking for a quick, healthy, and delicious treat, these flourless peanut butter cookies are the perfect choice with just a few simple ingredients.
Variations
Once you master the base no bake Oreo cheesecake recipe, you can easily turn it into fun flavor variations.
Mint Oreo
- Replace regular Oreos in the filling with Mint Oreos.
- Add ¼–½ teaspoon peppermint extract to the filling (go slowly—peppermint is strong).
- Garnish with crushed Mint Oreos and a drizzle of chocolate sauce.
Peanut butter
- Beat ½–¾ cup creamy peanut butter into the cream cheese mixture before folding in the whipped cream.
- Use Peanut Butter Oreos or swirl melted peanut butter on top.
- Decorate with chopped peanuts and extra Oreos.
Chocolate overload
- Add 2–3 tablespoons unsweetened cocoa powder to the cream cheese mixture with the powdered sugar.
- Replace some of the heavy cream with chocolate ganache swirled through the filling.
- Top with chocolate curls, chocolate sauce, and extra crushed Oreos.
Mini cups
Perfect for parties, buffets, or kids:
- Press a spoonful of crust mixture into the bottom of small jars, ramekins, or cupcake liners.
- Spoon or pipe the filling on top and chill 3–4 hours.
- Decorate each mini cheesecake with half an Oreo or cookie crumbs.
Mini versions set faster and are easier to serve in individual portions, especially when you don’t want to fuss with slicing.
Storage & Freezing
Taking care of storage is key for both texture and food safety.
Fridge storage
- Cover the cheesecake tightly (pan lid, plastic wrap, or an inverted bowl).
- Store in the refrigerator for up to 4 days.
- For best slices, keep it cold and only take out the portion you’re serving.
Freezing
- For clean slices later, freeze the cheesecake un-decorated.
- Chill fully in the fridge first, then wrap the whole pan or individual slices tightly in plastic wrap and then foil.
- Freeze up to 1–2 months for best flavor and texture.
- Thaw overnight in the fridge, then decorate and serve.
Food safety notes
- Because this dessert contains dairy, do not leave it at room temperature for longer than 2 hours total.
- During hot weather or outdoor events, aim to keep it on a chilled tray or bring it out shortly before serving and return leftovers quickly to the fridge.
Nutrition Table (Approximate, per slice – 1 of 12)
| Nutrient | Amount (approx.) |
|---|---|
| Calories | 480–520 kcal |
| Carbohydrates | 42–48 g |
| Protein | 6–8 g |
| Fat | 30–34 g |
| Saturated fat | 17–20 g |
| Sugar | 30–35 g |
| Fiber | 1–2 g |
| Sodium | 280–340 mg |
Values vary depending on brands, exact amounts, and decorations used, but this gives you a good ballpark for planning.
FAQs
Can I Use Low-Fat or Neufchâtel Cream Cheese?
You can use Neufchâtel or reduced-fat cream cheese, but the cheesecake will be noticeably softer and may not slice as cleanly. If you go this route, chill overnight and serve very cold.
Low-fat cream cheese has more water and less fat, which means less structure. For the most reliable, restaurant-style texture, full-fat brick cream cheese is strongly recommended.
Can I Use Different Cookies Instead of Oreos?
Yes, this recipe is very flexible when it comes to the crust and mix-ins.
Great alternatives:
- Chocolate sandwich cookies of another brand
- Golden sandwich cookies for a vanilla base
- Chocolate graham crackers or digestive biscuits, with a bit more butter to bind
Just keep the total crumb amount and butter ratio roughly similar so the crust still holds together.
Why Didn’t My Cheesecake Set Properly?
Common reasons:
- Cream not whipped to stiff peaks (it should stand straight up).
- Using tub or low-fat cream cheese with too much moisture.
- Not chilling long enough (under 4–5 hours is usually too short).
- Adding extra liquid ingredients (like too much flavoring or sauce) without adjusting anything else.
If your cheesecake is soft but still tasty, you can serve it as a “cheesecake mousse” in cups and treat it as a chilled dessert instead of slices.
Can I Make This the Day Before an Event?
Absolutely—and you should. No bake Oreo cheesecake is one of those desserts that actually benefits from being made ahead.
Make the crust and filling the day before, chill overnight, and decorate the top the morning of your event or just before serving. This way, you’re not rushing, the cheesecake is fully set, and slices come out perfectly.


 (2)")